Tags
bridal bouquet, Buttons and All, DIY bridal bouquet, Emily T Photography, Jena Boggs, Lotus Blossom Photography, make your own bridal bouquet, Nancy Center Photography
When friend Amber Vongsamphanh (with Lotus Blossom photography) began talking about a photo shoot she, Emily T and Nancy Center were working on, she mentioned wanting a bouquet for her brides/models to use during the shoot. Because bridal bouquets are SO expensive, buying one was not an option, so…I volunteered to make one!
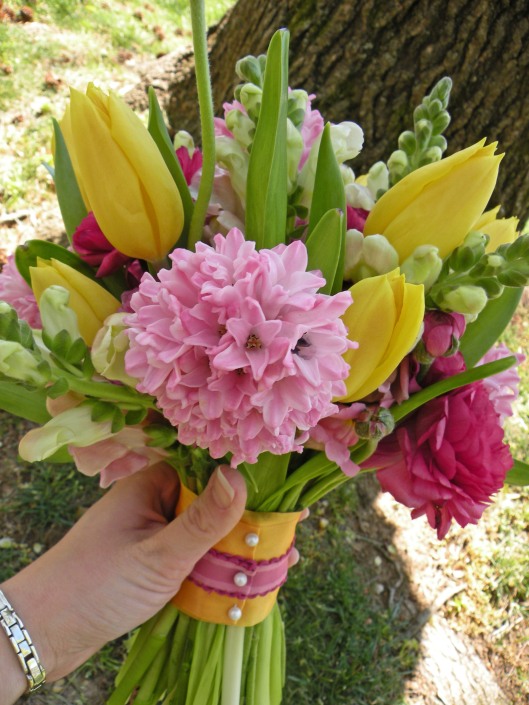
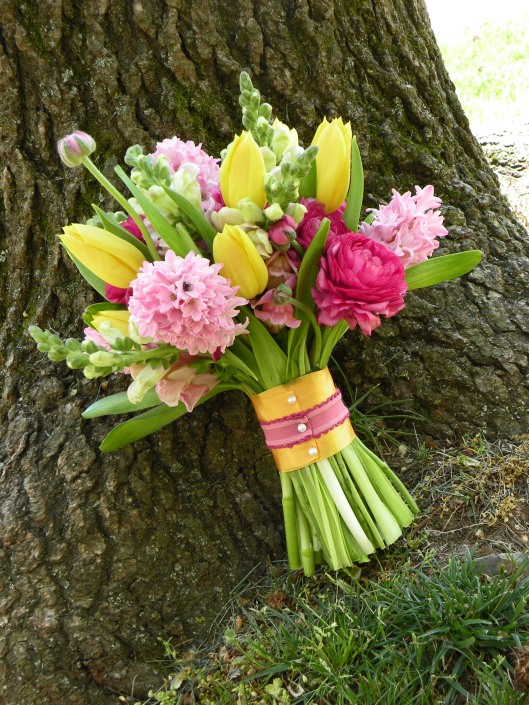
My sister Jena, who has an eye for design and is often a lifesaver, agreed to stop by our favorite wholesale florist and pick up some flowers for the bouquet. She chose beautiful yellow tulips, bright pink ranunculus, and hyacinth. After staring at them for at least 24 hours, I finally jumped in. I was really excited about the finished product and can’t wait to see the pictures taken today!
I really like working with flowers but am often intimidated. Bouquets are not incredibly difficult to make but can sometimes be tricky, depending on what flowers you use. Below, I’ve listed the steps for creating your own bridal bouquet.
Making a Wedding Bouquet
You will need flowers, paper towels (to dry off stems), corsage pins, floral tape, scissors, ribbon to wrap the stems, vase and water (duh!)
- First decide on the shape. A dome shape for multiple flowers is the most popular choice and is easier to tie.
- Small bouquets suitable for the more petite bride will require approximately 25-30 stems. Double the quantity for the taller bride. I like to use LOTS of flowers but be careful that your bouquet does not become too thick to carry!
- Remove unwanted leaves and prickly thorns.
- Holding the stems under water for better preservation, cut the stems at an angle slightly longer than required for the final bouquet.
- Start to arrange flowers together, using your non-dominant hand to hold the bunch and the other to place the next stem alongside, overlapping each stem at an angle.
- Once all flowers are in place, wrap the stems with floral tape and leave to rest in water for a few minutes.
- Cut the flowers to the required length.
- Take a piece of ribbon which is three times the length of the stem and wrap the flowers carefully from the top of the bouquet, going round and round until you reach the bottom or as far down the stems as you prefer. Repeat the process back up the stem, securing the ribbon underneath the flower heads with a pin.
- Spray the flowers with a finishing product and place in water. Store in the refrigerator while at home, if possible and store in water until you need them for pictures, ceremony, etc.
Ta da! Doesn’t sound too hard, huh?


Thank you soooooo much!! You did a wonderful job!! Emily got some great detail shots of it for you too!
Emily! You did an amazing job with the bouquet! The pictures are simply gorgeous! 🙂
This bouquet is incredible. It is truly inspiring to those of us out there that aren’t floral designers but are interested in creating our own bouquets. I would be thrilled to carry a bouquet like this one at my own wedding!
Pingback: DIY bouquet – Danielle’s blue and white bridal bouquet | Kennedy Occasions
Pingback: “I don’t know why you say goodbye – I say hello”! | Kennedy Occasions